


How to Photograph Crystals and Mineral Specimens Accurately

Mineral photography is not only about making a crystal look impressive. A useful photograph should communicate color, luster, crystal form, condition, scale, matrix, and any repair or treatment without creating a misleading version of the specimen.
Decide the Purpose First
| Purpose | Priority |
|---|---|
| Online sale | Accurate color, scale, condition, all sides, flaws, label |
| Collection catalog | Specimen ID, locality, repeatable lighting, dimensions |
| Scientific record | Scale, number, diagnostic features, controlled processing |
| Social media | Visual impact without hiding condition or changing color |
| Insurance | Full object, unique features, label, current condition |
Prepare the Specimen Carefully
Do not clean a mineral merely for a photograph unless you know the species, matrix, treatments, and safe method. Remove loose dust only when appropriate. Do not use oil, water, polish, smoke, or “shine enhancers” to create a better image.
Review How to Clean, Store, and Display Mineral Specimens.
Use a Neutral Background
A plain gray, white, or black background helps isolate the specimen. Gray is often easiest for exposure and color. White can make transparent edges disappear, while black can hide dark matrix and exaggerate transmitted light.
- Use a matte surface to reduce glare.
- Curve paper behind the specimen to remove the horizon line.
- Avoid patterned cloth for identification or sales records.
- Add an alternate background when transparency or dark edges need clarification.
Control the Light
Use soft, diffuse light from more than one direction. Avoid mixing daylight with warm household bulbs because the camera may not correct both accurately.
Reflective minerals
- Increase diffusion.
- Move the light to shape reflections.
- Use white cards to reveal dark faces.
- Prevent bright surfaces from becoming featureless white.
Dark specimens
- Raise exposure carefully.
- Use side light to reveal texture.
- Do not crush shadows during editing.
Set White Balance
Automatic white balance can shift purple toward blue, warm quartz toward orange, or green minerals toward cyan. Place a neutral gray card or color reference in the first frame under the same light, then correct the entire set consistently.
Do not adjust every image until it looks most dramatic. A customer should not receive a specimen whose color differs substantially from the listing.
Include Scale
At least one catalog or listing image should include a ruler, scale bar, or object of known dimensions. Place it in the same plane as the specimen and state measurements in the description. A hand, coin, or candle should not be the only scale.
Photograph Several Angles
- Primary display face.
- Left and right sides.
- Back.
- Top.
- Base or underside.
- Close-up of diagnostic crystals.
- Close-up of damage, repair, glue, coating, or unusual texture.
- Label and catalog number.
The underside often reveals matrix, saw cuts, mounting adhesive, old labels, and repair evidence that the front hides.
Transparent and Translucent Specimens
Use both reflected and transmitted light. Backlighting can show zoning, inclusions, internal fractures, and transparency, but it may make color look more saturated. Label backlit images clearly and do not use them as the only representation.
Macro Photography and Focus Stacking
Close mineral groups may exceed the depth of field of one exposure. Focus stacking combines photographs focused at different distances.
- Keep the camera and specimen fixed.
- Use manual exposure and white balance.
- Move focus in small increments.
- Inspect for halos, duplicated edges, and missing fibers.
- Disclose stacking in technical documentation.
UV and Fluorescence Images
Photograph fluorescence in darkness with the correct UV source and eye and skin protection. State whether the light is longwave, shortwave, or another wavelength. Include a normal-light image beside it. Read Why Do Some Minerals Glow Under UV Light?.
Correction vs. Misrepresentation
| Usually Appropriate | Misleading |
|---|---|
| Crop and straighten | Reshaping crystals |
| Correct white balance from a neutral reference | Changing hue to a more valuable color |
| Moderate exposure correction | Removing chips, glue, cracks, or matrix |
| Remove camera-sensor dust spots | Remove dust or inclusions present on the specimen |
| Focus stacking with artifact review | Combine crystals from separate specimens |
Link the Image to the Label
Photograph the specimen with a unique identifier and photograph every old label. Keep the specimen number consistent in the catalog, file name, physical label, and backup. A useful file name is AO-MIN-0042_fluorite_illinois_front_2026-07-20.jpg.
A Simple Home Setup
- Stable table.
- Matte gray paper sweep.
- Two diffused lamps with the same color temperature.
- Phone or camera on a tripod.
- Gray card and ruler.
- Remote shutter or timer.
Repeatability and honest representation matter more than expensive equipment.
Photographing for Sales
Show the specimen as the customer will receive it. State dimensions and weight. Disclose magnification, backlighting, focus stacking, wet photography, and UV lighting. Avoid filters and saturated presets.
Browse Crystals & Stones to compare how clusters, polished forms, and carvings need different angles. A Freeform Gemstone Palm Stone should show polish, edges, thickness, and variation, while a cluster should show matrix, terminations, and the underside.
Frequently Asked Questions
What background is best?
Neutral gray is a reliable starting point. Add white or black when it helps show transparency or edges.
Should I photograph crystals in sunlight?
Indirect daylight can work, but direct sun creates harsh highlights and changes quickly.
Can I increase saturation?
Only enough to correct a documented camera error. Do not intensify color beyond the specimen’s stated viewing conditions.
Do I need a macro lens?
No. Many phones and standard lenses can document a specimen well with stable support and adequate light.
Should every listing show flaws?
Yes. Damage, repair, glue, coating, saw cuts, and unstable areas should be visible and described.
Why photograph the label?
The label preserves identity, locality, collector history, catalog number, and treatment information.
Accurate Images Preserve Trust
Use controlled light, neutral color, scale, multiple angles, honest editing, and linked specimen records. A strong mineral photograph should make the object easier to understand, not transform it into a different object.
Tools for this practice
Explore the products selected for this guide. Review each listing for what is included and how to use it.

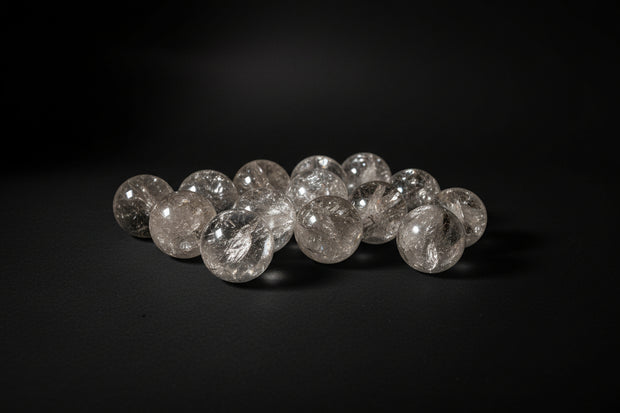
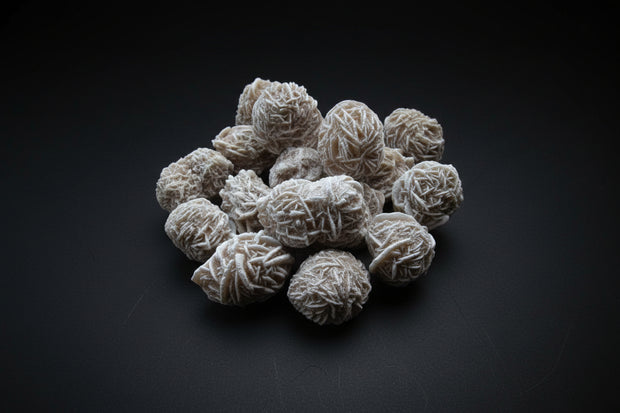

Shop this guide · 4 items Collapse



Keep exploring the shop
You made it to the end of the guide. Keep exploring through related products, major departments, or the full catalog.
 RELATED TO THIS GUIDE
Crystals & Stones
Shop this topic
RELATED TO THIS GUIDE
Crystals & Stones
Shop this topic


Leave a comment